Basically this is how I answered this question last time.... As Alan mentioned you can fit a spanner up the holes if you want which saves Steps 8 & 9..
or if you're good enough you could put the bolt through the other way...
Executive Summary
This is for the lucky ducks who have got themselves a rear brace for their N15. The issue is that the JN15 came with captive nuts in the mounting holes. This meant you can just screw a bolt into the holes without any issues. Our problem is that they are not present on the Australian delivered chassis.
This tech article should apply to all VZR, GTi and Cusco Rear Braces
Technically, it's not a strut brace as it mounts above the struts but we'll just call it a strut brace for the time being
----------------------------------------------------------------
SO.. People in the past have drilled right through the pillar in order to mount strut braces. The issue here is that there is a slight angle on the pillar and spring washers are needed to make the brace secure without it coming loose all the time. It also tends to crush the pillar a bit if it is too tight.
Blitz (I think) came up with an idea to sit some bolts with a lip in the hole and weld it on. Works quite well but requires welding.
This solution hit me one night late when I was probably drunk and should have been thinking about gambling and girls. It allows the car to remain untouched and completely reversible which is what I like.

----------------------------------------------------------------
Ingredients
One Rear Brace
2 Pieces of string (50cm or so)
4 High tensile Bolts (8-10mm diameter) (small enough to fit through the holes)
At least 6 High tensile Nuts (to fit bolts)
8 Washers to fit bolts
Patience
Socket set to remove bash plates
2 Spanners to tighten bolts
A flat metal piece with two holes in it to act as support (optional)
----------------------------------------------------------------
Step 1: Remove the Rear Seats
You can fold the bottom half forward to give yourself more room
There are two bolts on each side near the doors and two bolts in the middle where the two halves join.
Take the seats out to give you full access to the bash plates.
Step 2: Remove Bash Plates
There are hundreds of little bolts to remove. It takes about 10 mins but its the only way. You need to unhook the boot wall linings from its clips to give you access to it all and take out the boot carpet
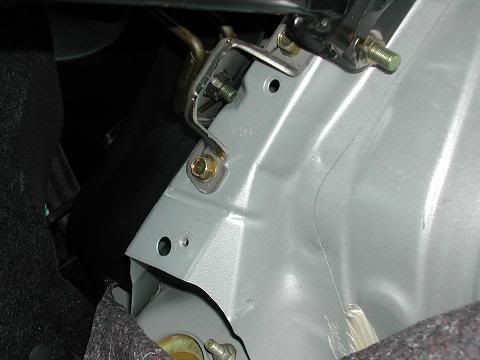
You should now see something like this:
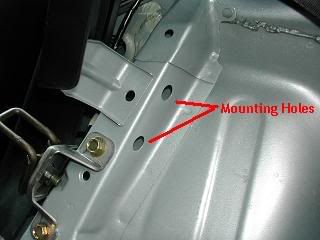
The Mounting Holes are at the top of that area here:
This is my MS Paint version so you can understand the following diagrams:
Step 3:
Feed some string with some weight on it down through the mounting holes. You will need a piece of string through each hole. You may be best off tying the string off so it doesnt all fall through.
Step 4:
Feed the washers and bolts through the metal plate and tie the string to the very tip of the bolts. A clove hitch knot works best here. (For those who were Scouts)
[The metal plate is optional as the pressure is then spread across the pillar as opposed to on the individual holes. I imagine the pillar to be strong enough but I though this may be a better way to distribute the force]
Step 5:
Pull the string from the top so that the bolts are lifted and sit through the mounting holes.
Hard part done!
Step 6:
Remove string. Don't lose the bolts back through the holes.
 Step 7:
Place the strut brace over the bolts being careful not to knock them back into their holes.
Add the washers and nuts as quick as possible to make sure they stay there.
Tighten as much as possible by hand.
Step 8:
Add two more nuts onto the end of the bolt. (Thanks CoZZm0 for the idea)
Lock these nuts together so that they do not move.
Use a spanner to hold these two nuts together and stop the bolt from turning.
Use another spanner to tighen the nut holding on the strut brace.
When you are happy with the torque you can do it for the other bolt.
Step 9:
Take end nuts off and repeat Steps 3-8 for the other side.
Step 10:
Replace all the bashplate screws, carpets and seats in the reverse order to Steps 1 & 2
Step 11:
Stand back and observe.
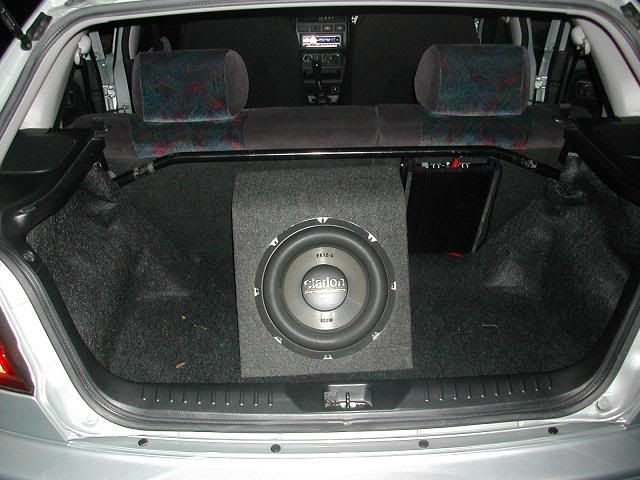
It should look something like this. (If it doesnt.. you buggered it up)
VZR/GTi Brace
Advantages: Sits perfect with parcel shelf, inconspicuous, factory made
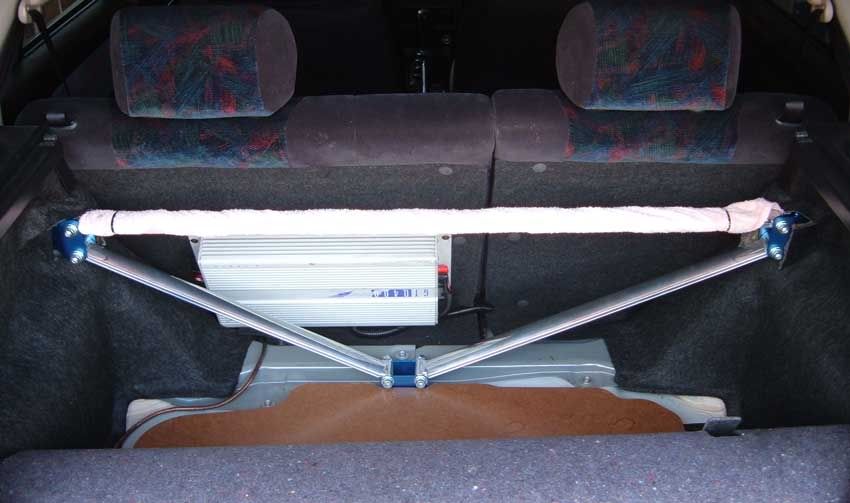
or this
Photo Courtesy of CoZZm0
Cusco 3 Point Rear Brace
Advantages: Removable 3rd Point for extra tightness, BLINGY!
Thanks for reading. If you have any questions then shoot me a PM. If you find any mistakes or obmissions then publically abuse me in this thread.
If you want a Rear Brace desperately then PM me and I'll see what I can do.
Andrew.
P.S. Please ask before stealing this to post on other websites.


